The short answer: without a ceiling mount you have four honest routes — a weighted freestanding stand, a wall bracket fixed into studs or masonry, a clamp on exposed structural steel, or a spreader board bridging existing joists. A doorframe tension mount is the fifth option people ask about, and it is usually the wrong call.
Here is how to hang a heavy bag without a ceiling mount safely, method by method, with the load limits and hardware each one needs. Most of this is a Saturday afternoon with basic tools. The one exception is masonry, where a hammer drill changes the job.
Table of Contents
- What You Need
- Step-by-Step
- Common Mistakes
- Frequently Asked Questions
- Is a wall mount safer than a ceiling mount for a heavy bag?
- Can I hang a heavy bag in an apartment or rental?
- How much weight can I safely hang without a ceiling mount?
- Do I need floor protection under a freestanding bag stand?
- How much swing clearance does a heavy bag need?
- What can I train on instead if I cannot mount anything at all?
- Final Safety Checklist
What You Need
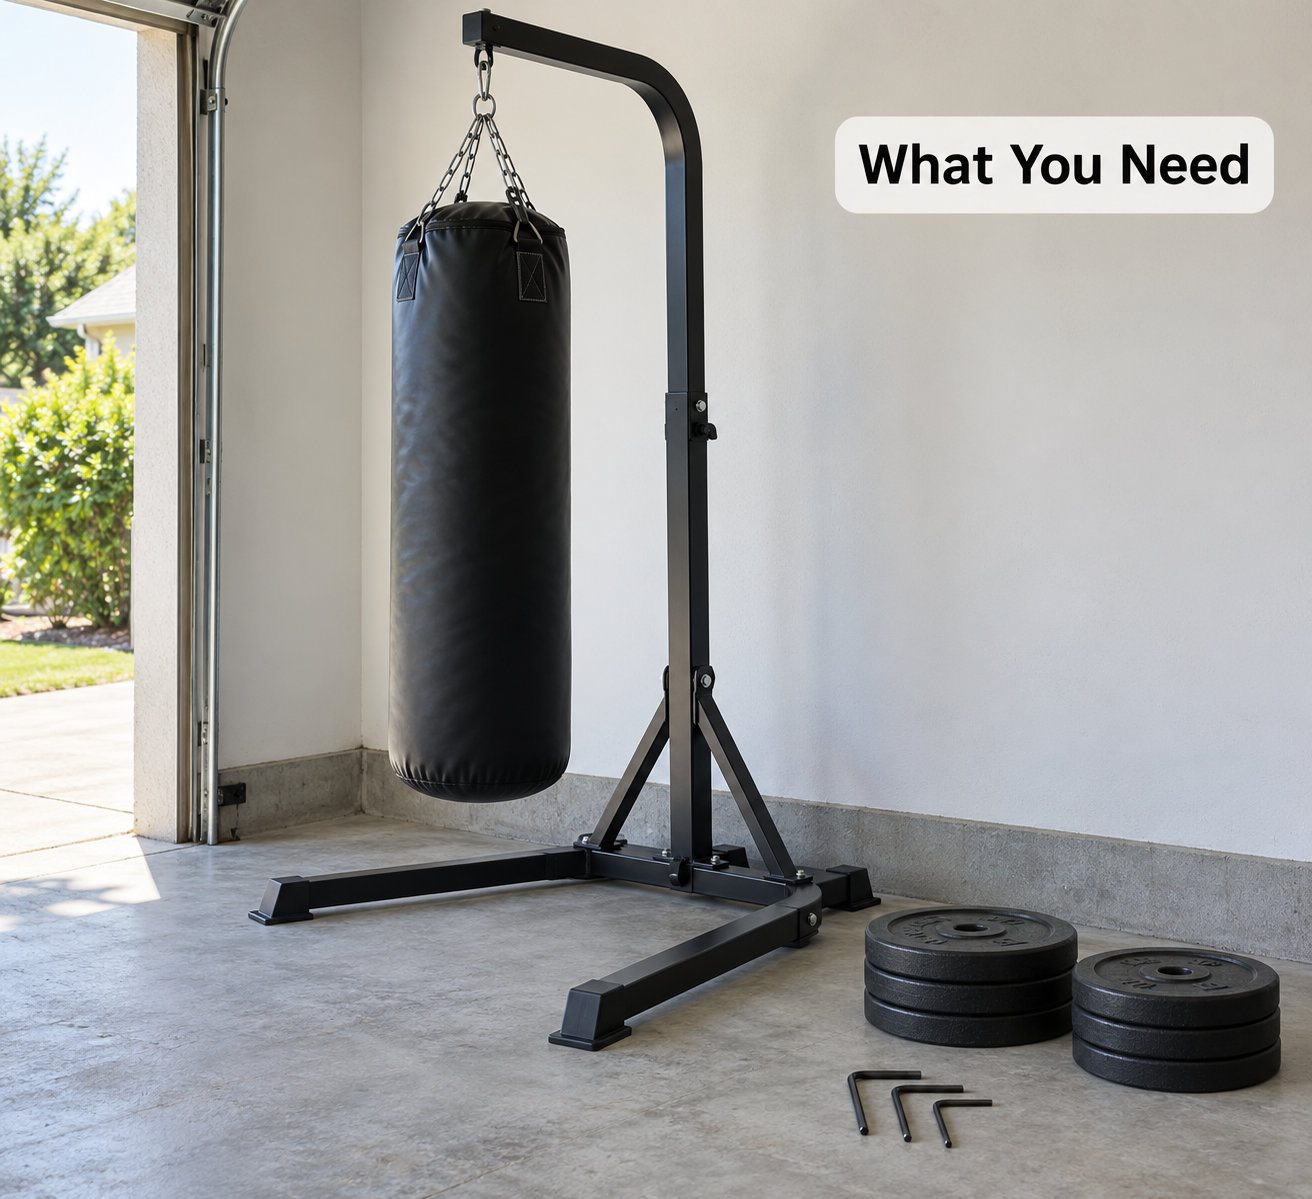
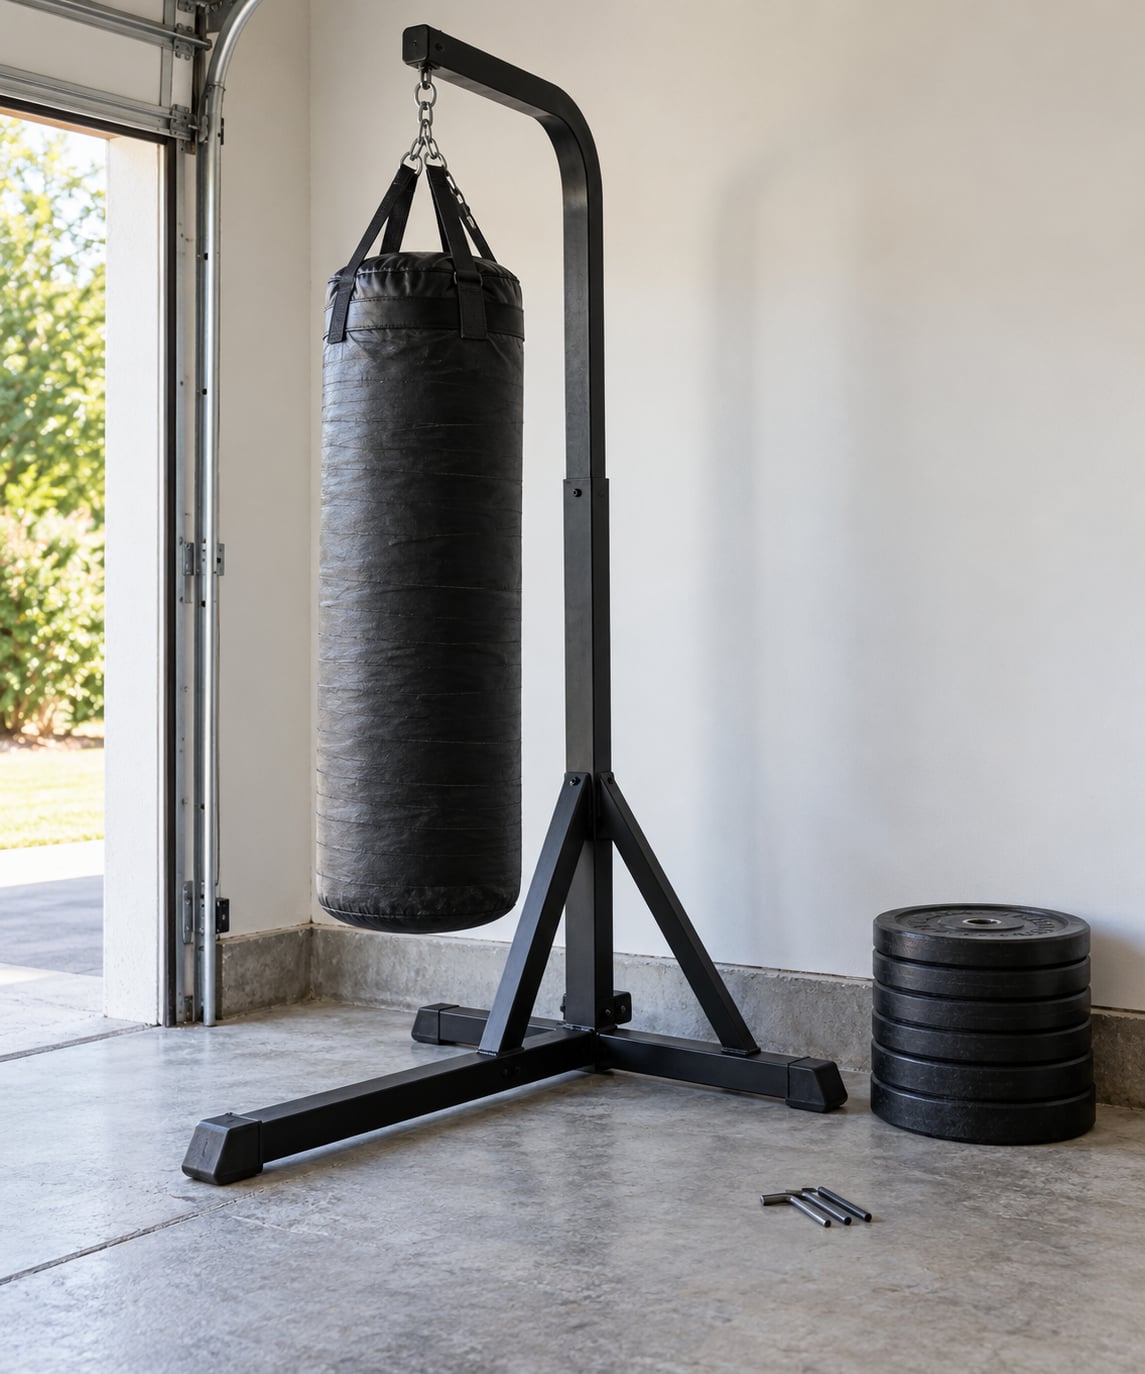
A freestanding stand needs almost nothing beyond the stand itself. That is the whole appeal: no holes, no landlord conversation, no engineer. You want a frame with a wide base footprint, rubber feet so it grips instead of skating, and plates or a fillable reservoir rated above your bag’s weight.
Sand fill is heavier and more stable than water, and it will not freeze or leak across a garage floor. Water fill is faster and cheaper, and it sloshes rather than shifting, but bags with a water base have a habit of weeping when you drag them over rough concrete.
A wall bracket needs a short arm, a mounting plate with at least two fasteners, a stud finder or a knock test, and a lag screw sized to bite at least two inches into solid wood. For masonry you add a hammer drill, a masonry bit matched to the anchor, and wedge or sleeve anchors rated well above your bag.
A steel clamp needs nothing but the steel. Weldless beam clamps grip an I-beam or column by friction, which means you skip the drill entirely and can move the bag later without patching anything.
Spreader boards need two 2×6 boards, a handful of lag bolts with washers and nuts, and a plate sized to bridge the joists you are spreading across. Buy your hardware from a supplier that stamps a working load limit on it — unrated hooks are not worth the risk at any weight.
Step-by-Step
1. Choose a Safe Location
Pick the spot before you buy anything. You need roughly six feet of clearance in every direction from the bag’s swing, plus the bag’s own length below the mount, and a floor that can carry the load without flexing toward a hollow space.
Keep the swing path clear of doorways, ceiling fans, light fixtures, television screens and anything glass. In a garage, stay off the garage door path — a swinging bag over a door track is how a good install turns into a repair bill.
If you rent, check the lease for a structural-modification clause before anything else, and ask in writing. A freestanding stand sidesteps the question entirely.
2. Choose a No-Ceiling-Mount Setup
Match the method to the building you actually have. No joists and no drilling means freestanding. Two exposed steel beams mean a clamp. Finished drywall ceiling with accessible studs means a wall bracket. Exposed wood joists mean a spreader board, which is technically a ceiling-adjacent fix rather than a true ceiling mount.
For rented rooms, concrete ceilings and low-ceiling spaces, the freestanding stand wins almost every time. It costs you swing feedback and a little floor space, and it costs you nothing in structural risk.
3. Check the Bag and Hardware Ratings
Work in multiples, not pounds. A 100 lb bag generates several times its own weight as a dynamic load every time it connects and rebounds, so treat your mounting system’s rating as at least two to three times the bag’s static weight before you add your body hitting it.
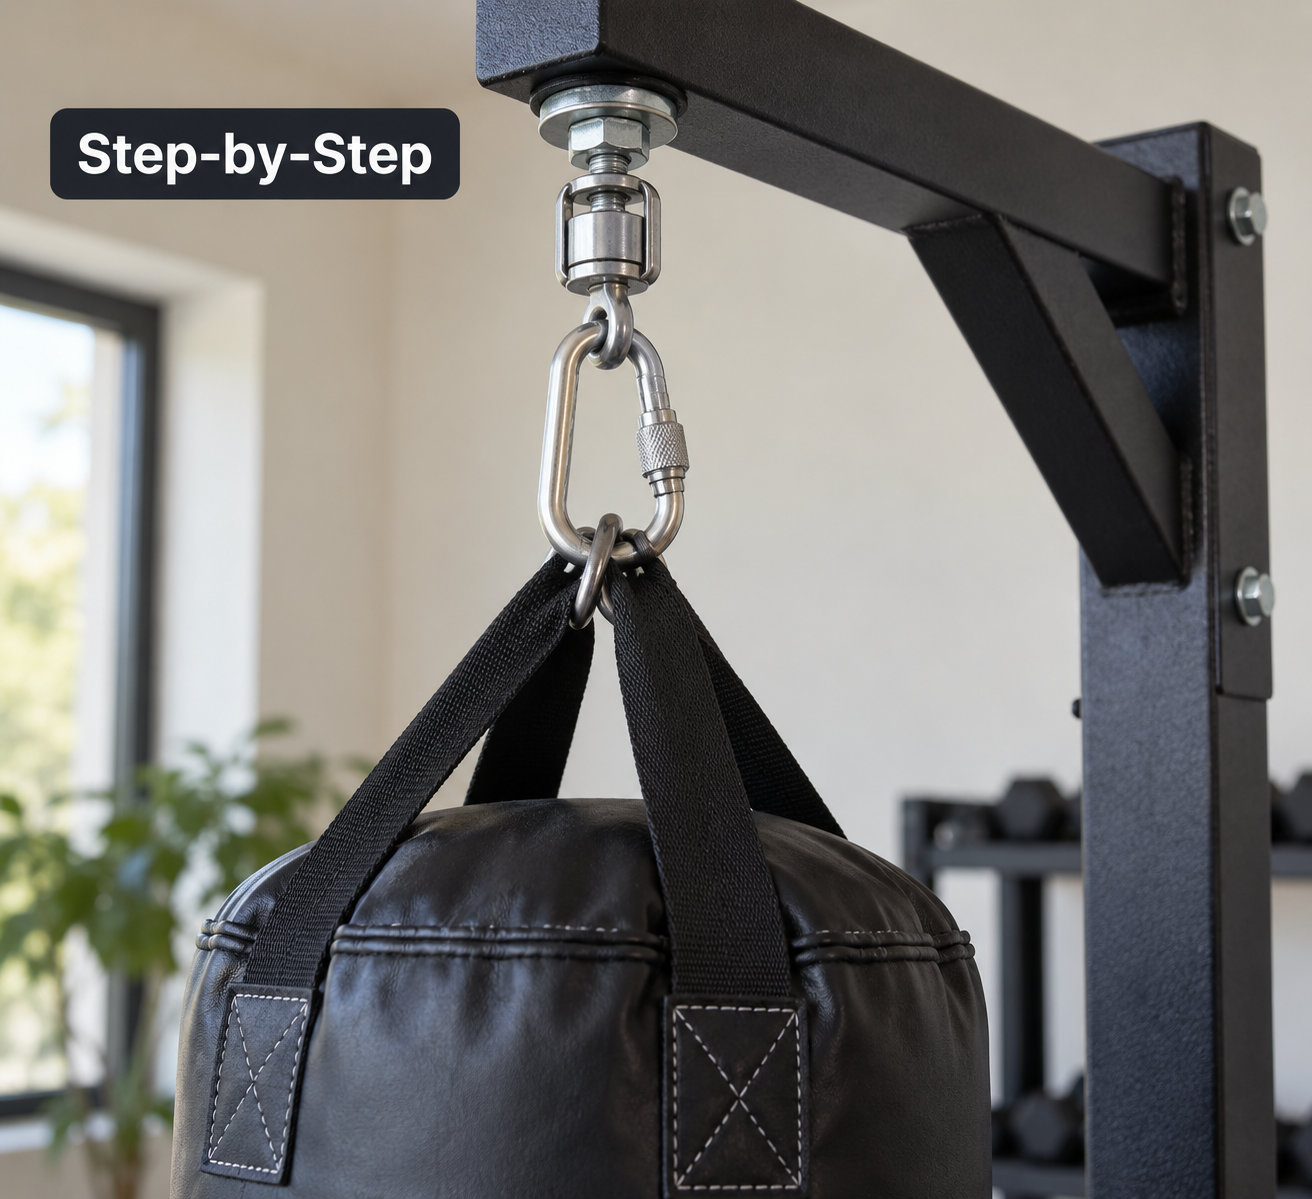
Match the hanger hardware to the bag: a swivel for rotation, rated clips or a carabiner for the reinforced hanging loops, and a safety cable as a backup on anything above roughly 70 lb. Replace any chain, clip or swivel showing rust, kinks, flattened links or a stiff gate. Skip the bag itself if the loops are pulled, frayed or stitched with thin thread.
4. Assemble the Stand
Build it in the manufacturer’s order and do not skip the order. Lay the frame flat on a level floor, fit the cross members, then fill the base before raising the upright.
Place plates low and centred — an off-centre fill tips the stand on the first hard combination. Torque every fastener to the stated spec, tighten the locking nuts after the stand is upright, and level it with the feet before the bag goes on. If the frame rocks on any diagonal, correct it now rather than after a session.
5. Attach the Heavy Bag
Hang the bag from its reinforced loops only. Run the swivel at the top so the bag can turn through a full circle instead of twisting the chain, then connect the clips or carabiner and close every gate by hand.
Set the drop height so the bag’s bottom lands about the height of your shin when you stand in punching stance. Add the safety cable as a second, independent connection. Never improvise with cord, rope, S-hooks without a spring link, or a single eyelet in drywall.
6. Test and Secure the Setup
Test before you train. Push the bag with an open palm and let it swing, then step back and watch the frame for movement at the base rather than at the bag. Base movement means the fill is wrong, not that the bag is heavy.
Then go bigger in stages: a few slow shots, then combinations, then a hard round. After each stage, check every fastener by hand, watch the upright for lean, and look for fresh cracks in drywall or movement in the wall plate. Anything that shifts, creaks or shows damage means you stop and fix it before the next session.
Common Mistakes
Using drywall anchors for a heavy bag. Anchors rated for pictures fail at bag loads because the swinging force is sideways and repetitive, not downward. Either find solid framing, hit masonry with a proper anchor, or drop the ceiling-mount idea entirely.
Hanging a bag from a single 2×4 or a non-load-bearing partition. A 2×4 laid flat on top of a joist is sometimes just a spacer between ceiling drywall and framing. It is not structure. Knock on the wall and look for the joist or stud itself, and spread the load with a board rather than trusting one narrow member.
Hanging too high. Above head height, a bag swings down into you with nothing to absorb it. Lower the drop point and you cut the worst of the rebound energy before it reaches your body.
Leaving too little clearance. A bag that clips a fan blade, a light fixture or a wall will eventually take something down with it.
Using unrated hardware. Hardware-store carabiners, unrated hooks and thin cord are not bag hardware. Look for a stamped working load limit several times your bag weight and match the whole chain, swivel and clip set to that figure.
Forgetting to lock the base. Unlocked fasteners on a freestanding stand are how the stand walks across a room mid-round.
Ignoring the stated limit. Manufacturer load ratings exist because something failed in testing. Exceeding them puts a bag over your head and someone’s ceiling below you.
The prevention habits are unglamorous and effective: inspect bolts, chains, clips and swivels monthly, retighten after the first few sessions as everything settles, keep the swing zone clear, and re-check the mount whenever you move house or change rooms.
Frequently Asked Questions
Is a wall mount safer than a ceiling mount for a heavy bag?
No. A wall bracket converts the swing into a bending moment on its fasteners, and that moment grows with the length of the arm. Keep the arm short, fix into studs or masonry rather than drywall, and stay under roughly 70 lb. A ceiling mount anchored into a real joist handles sideways load far better. If your ceiling has no structure, a freestanding stand beats both.
Can I hang a heavy bag in an apartment or rental?
Only with written permission if you are drilling anything. Most leases include a clause against structural modification, so ask your landlord or property manager in writing and describe the fastener, the structure and the bag weight. The easiest route is a freestanding stand, which touches no wall and moves with you. Keep to tight quiet hours and lay a mat under the bag to protect the floor.
How much weight can I safely hang without a ceiling mount?
Treat the rating as three times the bag’s static weight, because a swinging bag produces a dynamic load far above its resting weight. Most wall brackets cap out around 70 lb. Freestanding stands vary widely, so read the rated capacity rather than guessing from the frame’s look. Above 100 lb, use a steel beam clamp or a spreader board across multiple joists.
Do I need floor protection under a freestanding bag stand?
Yes. The stand’s base plates concentrate a point load on the floor, and a filled base is heavy enough to dent tile or scratch hardwood if it shifts. A few interlocking foam tiles under the footprint cost little and take the worst of it. If your stand has a water base, expect slow weeping over rough concrete and put a mat down anyway.
How much swing clearance does a heavy bag need?
Plan for about six feet of clearance in every direction from the bag, measured to the top of the bag’s swing rather than its resting position. Add the bag’s length below the mount to your ceiling height to work out whether it hangs low enough to punch without the floor being in the way.
What can I train on instead if I cannot mount anything at all?
Shadowboxing with a timer, resistance bands, a reflex ball or double-end ball, and pad work with a partner all build real skill without a mount. Freestanding water-filled bags and reflex bags suit apartments best, since they need no structure and stay inside a small footprint. Speed rounds and combination drills transfer straight to the bag later.
Final Safety Checklist
Start here: confirm the structure is real and rated, pick the method that matches your ceiling type and your lease, assemble the base fully locked and level, attach the swivel, clips and safety cable, then test gently before you test hard.
Stop using the setup the moment anything moves. A frame that leans, a fastener that turns by hand, a chain with a kink or a fresh crack in a wall all mean the same thing — do not punch again until it is fixed.
Last reviewed for 2026. If you cannot identify what you are fixing into, or the structure is unknown, get a contractor or structural engineer to look at it before a bag swings anywhere near your head.